Author Topic: 1990 Fiat 126 BIS  (Read 39631 times)

0 Members and 1 Guest are viewing this topic.

shielsy

  • Super Member
  • ***
  • Posts: 721
  • Karma: 0
Re: 1990 Fiat 126 BIS
« Reply #30 on: June 29, 2015, 10:19:22 PM »
how much oil does your gear box hold

Crusader

  • Member
  • *
  • Posts: 31
  • Karma: 0
Re: 1990 Fiat 126 BIS
« Reply #31 on: June 30, 2015, 03:24:37 PM »
Henmiester - Thanks mate, I am glad my thread is inspiring you to crack on with your own project.

Shielsy - Not sure, I need to look it up.

Ok,

Another update today. This time I decided that the fuel tank needed to come off to be refurbished as I didn't like the look of it.

It needs a good Sandblasting and repainting as the paint was flaking clean off the tank. You may remember that I fitted braided brake lines to the engine. At the time I really wasn't happy as I'd had to join the braided lines to the old lines. It wasn't ideal at all but now the tank is off I can remedy this issue. The full length shot of the fuel lines attached together to the old lines.


Next up was the outside of the fuel filler hole in the rear quarter, looking rather grubby as soiled.

After a good polish and clean up.

Fuel filler neck tube and breather pipe were looking a little grubby as well.

So I gave them a good clean up and here they are after.

Finally, I wasn't happy with the fuel filler neck as it was rusty and scratched. As you can see this from outside of the car it needs to be painted before refitting.


As usual, thanks for looking and all comments welcomed.

Crusader

  • Member
  • *
  • Posts: 31
  • Karma: 0
Re: 1990 Fiat 126 BIS
« Reply #32 on: July 10, 2015, 11:28:23 PM »
So time for another update on my BIS. Freshly painted fuel filler neck fitted back on to the car. Was well worth doing for the end result I think.

Locked cap back on.

Next up it was on to matters under the bonnet. First up was fitting the N/S washer bottle back in to the car. Freshly filled up with new fluid.

But you know me by now. That loom simply won't do looking like that.
Starting with here.

Then it was all wrapped up with insulation tape.

Next up fitted the freshly painted master cylinder inspection cover.


Next up was to put the cars jack in to position in its holder. I hope this is the right was round. It looks about right.

Next up the spare wheel was fitted back in under the bonnet.

Then it was a matter of putting back the freshly cleaned plastic matting under the bonnet.


I just need to get myself the correct battery. Anyone know the model code? Also some plastic clips to secure the matting in.

But it's starting to come along now. Thanks for looking and all comments welcome as usual.

mintex

  • Subscribers
  • Super Member
  • ****
  • Posts: 496
  • Karma: 5
  • Location: Wrexham wales.
Re: 1990 Fiat 126 BIS
« Reply #33 on: July 12, 2015, 11:18:21 AM »
Looking really good mate  :good:
Dave

Crusader

  • Member
  • *
  • Posts: 31
  • Karma: 0
Re: 1990 Fiat 126 BIS
« Reply #34 on: August 13, 2015, 06:24:15 PM »
Cheers Mintex  ;)

Ok,

So I've been getting busy with the BIS.

First update is painted the original wheels in a lovely shade or Gloss Grey. They came up really nicely.
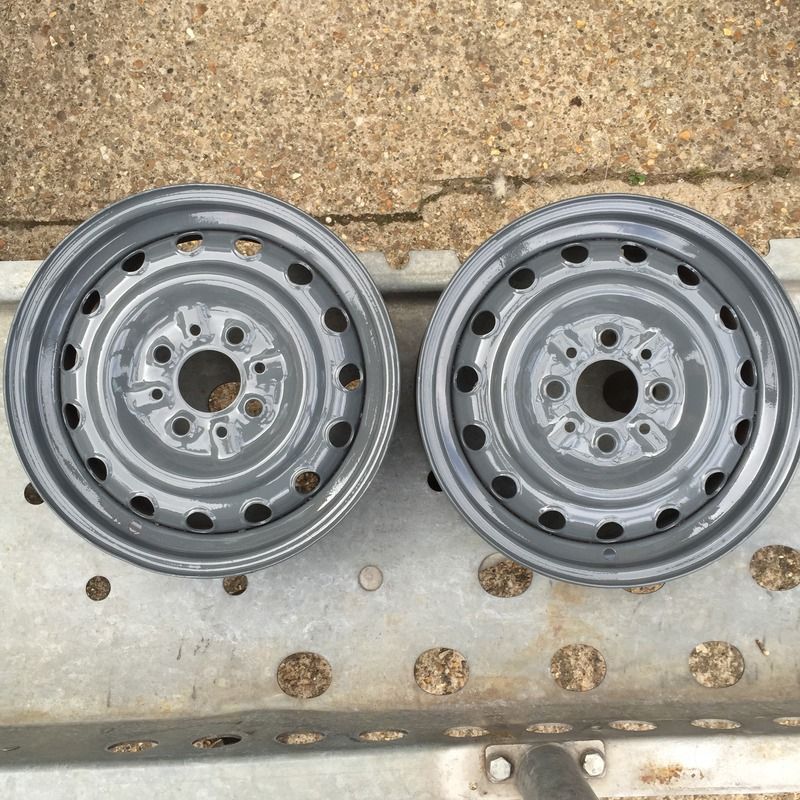
Then it was time to wrap them in some new Hankooks.


Next update, if you remember the problem I had with the sump plug. Well I'm really pleased I decided to repair it. After a trip to a local engineering firm, this was the result.


From the inside of the sump.

Next thing I noticed was the water pump impeller was a bit stiff. So I decided to strip down the pump housing and give it a clean and blow out. There was swarf and other dust inside so I'm glad I did.

The housing was also looking really crusty and in need of a good clean.

Then it was a matter of fitting up the sump with a new gasket and torquing the bolts down.


Next up was the pump housing refitted.

Then it was onto a new part. You may remember early on that my thermostat housing was rotten and gunked up. So here is the brand new replacement.

However from hearing all the horror stories, I decided to take a bold move. I removed the thermostat.

So the housing looks like this.

Thermostat housing bolted up to water pump, I know the engine will take longer to get up to temprature and I won't have full heat in the cabin. But from hearing how much these cars overheat I decided to ditch the thermostat to begin with.

So next up it was up to the top end of the engine. I cleaned the area where the rocker cover seals. I also cleaned off the rockers and the valve springs.

Repaired water Union with temperature sender fitted on to the block.

Freshly painted Gloss Black rocker cover fitted on to the cylinder head.

Next up was the exhaust system fitted on to the car.


Then the alternator and new belt mounted up to the engine.


Almost there now. Starting to look like an engine again and almost ready to go back in the little 126.

As usual, all comments welcomed and appreciated.

dadandlad

  • Super Member
  • ***
  • Posts: 298
  • Karma: 8
  • Location: Halifax West Yorkshire UK
Re: 1990 Fiat 126 BIS
« Reply #35 on: August 13, 2015, 08:19:10 PM »
Looking good
If you are refitting by yourself i would remove the shiny new thermostat housing , when i refitted my engine it slipped off the jack and landed on the housing and broke it  >:(

Gadge

  • Subscribers
  • Super Member
  • ****
  • Posts: 1353
  • Karma: 15
  • Location: Warwickshire
Re: 1990 Fiat 126 BIS
« Reply #36 on: August 14, 2015, 05:31:09 PM »
Very good work indeed  ;) a wise move with the thermostat I did the same. Although I run waterless coolant in mine I found it didn't take that long to warm up. If you switch the interior heater lever to the left, this stops the flow going to the front heater so it isolates it to just the engine so warms up quite nicely then once it's warm just flick it to the right. In the winter I find it belts out the heat even with no thermostat  ;D
FOR LACK OF A BETTER NAME

GET SOCIALBLE.  Instagram me on _gadge_ ;D

Piotross

  • Super Member
  • ***
  • Posts: 346
  • Karma: 7
Re: 1990 Fiat 126 BIS
« Reply #37 on: August 14, 2015, 09:40:31 PM »
looks so good :)

Crusader

  • Member
  • *
  • Posts: 31
  • Karma: 0
Re: 1990 Fiat 126 BIS
« Reply #38 on: August 19, 2015, 10:10:41 PM »
dadandlad - Cheers mate, that's good advice.

Gadge - Thanks buddy, that's pleasing to hear as I was a bit worried about whether it would be cold in the car. I guess with such a small cabin it won't take long to warm up. Great tip about the heater levers.

Piotross - Thank you very much.

So it's now time for an update.

Been completing the engine to get it ready to put back in the car. I've checked the clutch and release bearing. They're both in great condition so they will go back in to the car. I greased up in the input shaft and refitted the gear box back on to the engine.


Next up I stripped and repainted the flywheel inspection plate. Ready to refit.

Then it was the starter motor which has been rubbed down and cleaned and then clear coated.

I then took out the gearbox oil level filler plug. Unfortunately it was rounded and a little bit chewed up as you can see.


It was a 13mm square head. Although it was well rounded off. However it was in good condition elsewhere. So I decided not to replace and instead to try and repair. After some grinding on the wheel I was left with this. I managed to turn it down to a 12mm head and got it nice and straight.


Next up tomorrow is fitting the inlet manifold and carbeurettor. Then it's ready to be back in the car.


Hopefully it will be back in the car before the weekend.

As usual, all comments welcome and greatly appreciated. Thanks for looking.

Crusader

  • Member
  • *
  • Posts: 31
  • Karma: 0
Re: 1990 Fiat 126 BIS
« Reply #39 on: August 20, 2015, 07:06:34 PM »

Today's update on the BIS.

First of all, it was out with the old dirty gearbox oil. This was the remnants of what was poured away.

Then it was in with the lovely new clean 80W/90 oil via syringe through the filler hole.

Let's see a close up of the new fresh clean oil.

Apparently I've read that the oil in these gearboxes needs changing every 6000 miles or 6 months like the engine oil.

Next up was the new gearbox mounts, one was a bargain NOS buy from EBay, the other cost me a bit more.

Next up it was time to fit the inlet manifold and carburettor.


Next up it was time to slide it all back under the 126 and put it into position.


Come the end of the day this is what I was facing. Got a few more jobs to do but it's nice to see the engine back in the car.

As usual all comments welcome and thanks for looking.
« Last Edit: August 20, 2015, 07:11:58 PM by Crusader »

Gadge

  • Subscribers
  • Super Member
  • ****
  • Posts: 1353
  • Karma: 15
  • Location: Warwickshire
Re: 1990 Fiat 126 BIS
« Reply #40 on: August 20, 2015, 07:43:39 PM »
Looking good bud :thumbup: you've done a great job on the engine it looks new!  ;D
FOR LACK OF A BETTER NAME

GET SOCIALBLE.  Instagram me on _gadge_ ;D

Crusader

  • Member
  • *
  • Posts: 31
  • Karma: 0
Re: 1990 Fiat 126 BIS
« Reply #41 on: August 20, 2015, 08:20:30 PM »
Gadge - Cheers mate. I'm really pleased with how it looks so thank you for that. It does look quite factory now.

I almost forgot about this update. A very kind member on here sorted me out with a brand new linkage part for my carburettor choke flap. He sent away for it to Poland and then sent it on to me. What an absolute gentleman. So here is a brand new linkage part. You can see the old broken one.

This meant that I was able to rebuild the choke flap linkage so that it now works again like it should.

One massive thank you to Simon. You're a star.  ;D


Henmiester

  • Member
  • *
  • Posts: 93
  • Karma: 0
Re: 1990 Fiat 126 BIS
« Reply #42 on: August 20, 2015, 09:40:37 PM »
Rob. You're welcome if i can help get another 126 back on the road then its worth it. Great work by the way. Simon

Crusader

  • Member
  • *
  • Posts: 31
  • Karma: 0
Re: 1990 Fiat 126 BIS
« Reply #43 on: August 25, 2015, 04:29:31 PM »
Rob. You're welcome if i can help get another 126 back on the road then its worth it. Great work by the way. Simon

Thank you Simon. I really appreciate you getting me that part.

Ok so time for an update on the BIS.

I decided to remove the bumper and apron from the rear panel. Then it was time to soap it down and get rid of all that grease and grime.

Then it was time to flip it around to the other side. It's covered in black underseal and rust protection. Which is fine to protect it but it looks a little tatty.

As this can be seen from the engine bay I decided to recover it in White underseal to make it look more presentable which ended up looking like this.


Next up it was time to fit the panel back on to the BIS. It went back in to the car so nicely with no issue at all.

This means the engine and gearbox are fully secured back in to the car now which was a great feeling.

Also fitted some new ignition leads and the vacuum pipe work. Along with the freshly painted carbeurettor intake housing. The engine is almost done now.


Gadge

  • Subscribers
  • Super Member
  • ****
  • Posts: 1353
  • Karma: 15
  • Location: Warwickshire
Re: 1990 Fiat 126 BIS
« Reply #44 on: August 25, 2015, 05:51:08 PM »
Fantastic work   ;) soon it'll be start up time  ;D
FOR LACK OF A BETTER NAME

GET SOCIALBLE.  Instagram me on _gadge_ ;D