Author Topic: Guido the Fiat  (Read 60947 times)

0 Members and 1 Guest are viewing this topic.

nathan126

  • Super Member
  • ***
  • Posts: 253
  • Karma: 0
Re: Guido the Fiat
« Reply #225 on: April 18, 2009, 06:16:43 PM »
Great news!  :D
new email address: [email protected]

Pete126

  • Administrator
  • Super Member
  • *****
  • Posts: 3369
  • Karma: 35
  • Location: West Yorkshire
Re: Guido the Fiat
« Reply #226 on: April 20, 2009, 09:19:56 AM »
Looking good Gordan [-/ a little bit of paint and Guido will be as good as new ;)
Pete.      il cavallo piccolo

Gordan

  • Subscribers
  • Super Member
  • ****
  • Posts: 1689
  • Karma: 8
Re: Guido the Fiat
« Reply #227 on: April 27, 2009, 12:05:27 PM »
Well hes done, ok has been for 2 days but couldnt find the damn usb cable for my camera, it all turned out well, a few dents above the indicator are noticable form close-up, but otherwhise its cool. only bad thing is that square of new paint on the bonnet, which soo stands out from the rest of it...  :o
 
PLEASE FOLLOW MY PROGRESS ON IG: https://www.instagram.com/fiatbis/

Pete126

  • Administrator
  • Super Member
  • *****
  • Posts: 3369
  • Karma: 35
  • Location: West Yorkshire
Re: Guido the Fiat
« Reply #228 on: April 27, 2009, 07:11:51 PM »
It certainly looks better than it was, if you gently go round the edge of the square with some wet and dry 1200grit paper until its at the same level then T-Cut the hole bonnet and finish off with a good polish it should look better and hardly noticeable [-/
Pete.      il cavallo piccolo

Gordan

  • Subscribers
  • Super Member
  • ****
  • Posts: 1689
  • Karma: 8
Re: Guido the Fiat
« Reply #229 on: April 27, 2009, 08:21:29 PM »
will do, its either that or re-spraying the whole bonnet, which doesnt sound all that bad actually... :P
PLEASE FOLLOW MY PROGRESS ON IG: https://www.instagram.com/fiatbis/

Gordan

  • Subscribers
  • Super Member
  • ****
  • Posts: 1689
  • Karma: 8
PLEASE FOLLOW MY PROGRESS ON IG: https://www.instagram.com/fiatbis/

1973/126

  • Super Member
  • ***
  • Posts: 1753
  • Karma: 23
  • Location: Tunbridge Wells
Re: Guido the Fiat
« Reply #231 on: May 04, 2009, 10:26:39 PM »
 Nice one Gordan. Like all the gadgets [-/...
1972 Fiat 500
1980 Fiat 126

Gordan

  • Subscribers
  • Super Member
  • ****
  • Posts: 1689
  • Karma: 8
Re: Guido the Fiat
« Reply #232 on: May 05, 2009, 05:45:21 AM »
 :) :) :) im just waiting for a short circuit... :D :oops:
PLEASE FOLLOW MY PROGRESS ON IG: https://www.instagram.com/fiatbis/

stuey

  • Subscribers
  • Super Member
  • ****
  • Posts: 1409
  • Karma: 14
  • Location: kings lynn
Re: Guido the Fiat
« Reply #233 on: May 05, 2009, 07:30:00 AM »
nice to see Guido back in the running gordan- hopefully alan will join the ranks of the running cars in a week or so but this is a good mojo boost to see!!!  8)
one resprayed and another arrives- double trouble BIS style!!

Gordan

  • Subscribers
  • Super Member
  • ****
  • Posts: 1689
  • Karma: 8
Re: Guido the Fiat
« Reply #234 on: May 07, 2009, 09:37:00 PM »
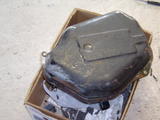
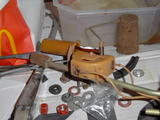
Well i had a free day today and decided to do something ive been postponing for a while - drop the tank, fuel tank that is. i had no idea its such a pain to remove one of these, but its out now, and i have a feeling its going to be a even bigger pain to put back. anyways i got a new f. level indicator cos the old one wasnt doing its job:


the tank was washed (water, a lot of it, hope it wont rust  :oops: ) and i painted it in Hammerite Red (now that i got a can of hammerite, i just cant stop painting... :D ) ill post a pic of that tommorow, when its nice and dry...

PLEASE FOLLOW MY PROGRESS ON IG: https://www.instagram.com/fiatbis/

Gordan

  • Subscribers
  • Super Member
  • ****
  • Posts: 1689
  • Karma: 8
Re: Guido the Fiat
« Reply #235 on: May 19, 2009, 08:37:32 PM »
Well as i said before, i got tired of the stock carpets so i decided to do something about it, went out and bought a standard black carpet for houses etc. the main problem was that the orig carpets were not completely flat, so what i did was put them under some bricks to flatten them, then draw the outlines on the new carpet and snip-snip-snip and done! i really didnt think id be able to do it, but i did it and here are the pics....
  

p.s. notice the attention to details in the cocpit, like the black-red ambi pur fragrancer, or the black-red chewing gum container near the gearshift...  :D :D
PLEASE FOLLOW MY PROGRESS ON IG: https://www.instagram.com/fiatbis/

Eklipze3k

  • Super Member
  • ***
  • Posts: 632
  • Karma: 2
Re: Guido the Fiat
« Reply #236 on: May 19, 2009, 09:21:06 PM »
You've even colour coded your handbrake lever!! No ... wait ...  :oops:

Gordan

  • Subscribers
  • Super Member
  • ****
  • Posts: 1689
  • Karma: 8
Re: Guido the Fiat
« Reply #237 on: May 19, 2009, 09:38:07 PM »
Haha... i prefer not painting parts that are used often, the paint usually just falls off.. :oops:
PLEASE FOLLOW MY PROGRESS ON IG: https://www.instagram.com/fiatbis/

Eklipze3k

  • Super Member
  • ***
  • Posts: 632
  • Karma: 2
Re: Guido the Fiat
« Reply #238 on: May 19, 2009, 09:47:32 PM »
Hehehe

In all seriousness though that looks great, something I'd love to try but am sure I would get hideously wrong and end up hating  :cry:

Gordan

  • Subscribers
  • Super Member
  • ****
  • Posts: 1689
  • Karma: 8
Re: Guido the Fiat
« Reply #239 on: May 19, 2009, 09:54:18 PM »
thx, the point is it was ridiculously easy, just draw and cut, i myself had no previous experience with this stuff, and it turned up great! and cheap...  :D
PLEASE FOLLOW MY PROGRESS ON IG: https://www.instagram.com/fiatbis/